
To quote Corey Potter of Fuel Your Photos:
“Not including body copy is probably one of the biggest mistakes that photographers make with their SEO.”
Photographers love to keep text minimal in order to let their images tell the story and while this is a romantic idea it does absolutely nothing for their SEO or the user experience. Yes, Google has gotten much better at reading images in recent years but it still prefers text. Words. Sentences. Paragraphs. Content.
(You can fit at least 300 words on your homepage, I know you can!)

One pretty significant piece of the SEO puzzle is how you categorize your various text boxes on your site. I sat down to talk about heading tags with Robyn Pigott, who is not only a close friend of mine but also an SEO expert, Google Analytics wiz and one heck of a fantastic copywriter. She shared some really great information on how heading tags (referred to as text tags in Showit) should be used within your website.
Never Forget Who You’re Writing For.
Psst! It’s not Google.First and foremost, every blog post and piece of text on your website should be written for the reader. Then it can be optimized for search engines, but not at the expense of good writing that people actually want to read!
What are Heading Tags?
Heading Tags refer to the different styles of headers or sub-headers that describe the content in a post or on a page. They break up the content to make it easier to read and understand. They serve a purpose for both the web visitor and Google. Visitors can use these headings to skim through a page to find the content they want.
Google also uses heading tags to understand the type of content on a page and determine if it’s well organized for the visitor. And that is important for SEO, because Google just wants to highlight quality content that meets the visitors’ needs.
So if visitors can easily read your content, so can Google. And vice versa.
Heading Tags Are Like the Title and Chapters of a Book.
You can think of heading tags like the title and chapters of a book. The title and chapters help categorize and organize the content. They are there to describe what you’re about to read. Heading tags also break up the content into sections that make sense so that you don’t go cross-eyed reading block of text after block of text without anything breaking up the writing.
Like a book, your blog post has a main title. That should be your H1. It should be the most prominent font on the page and you only need one. An H2 is like the name of a chapter. You can have as many H2s as you need to logically break up text. And each H2 should describe a section of content that supports the title.
Now We’re Throwing in an H3??
You can technically use anything from H1 to H6, but you can only change the H1 and H2 in Showit. H1 is always at the top of the hierarchy. But most websites don’t need to break down content past H3. You’ll most likely only ever use H1 for the title of a page and H2s to name subsections of the content. Maybe an H3 if you’re feeling crazy that day.
Styling H1, H2, and H3 to Match Your Branding
Set the style for H1, H2, and H3 to match your branding. But don’t change heading tags for style purposes!
Not only can improperly used heading tags create an inconsistent aesthetic on your site, but it makes your page’s content organization sad. Google can still understand what the content is about on your page, but you might make it a lot less clear and that can be seen as lower quality content.
So, how do you set your heading tags in Showit? It’s easy!
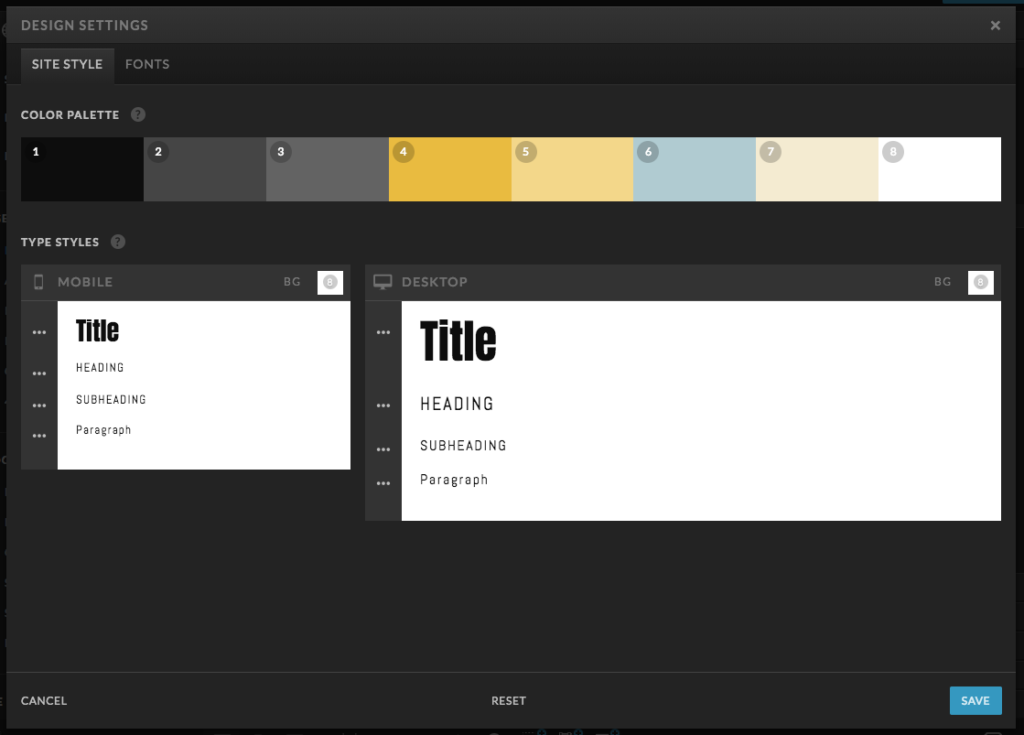
Let’s start with the Showit defaults. When you first start designing your site in the Showit app one of the first stops you’ll make is setting up your fonts. (In the app click Design Settings in the top left.) Here you’ll see four fonts that you’re able to set up. Showit automatically applies heading tags to each of these styles and you should keep this in mind when you’re working on your website.
Title: H1
Heading: H2
Subheading: H3
Paragraph: p
Are these properties set in stone? Absolutely not! In fact, you’ll more than likely want to make some changes to things as you’re moving along with your design.
The graphic below shows you how to easily change the text tag in Showit. Just click on your text box, head to the right side panel and select the text properties section. Showit refers to the heading tags section as text tags.
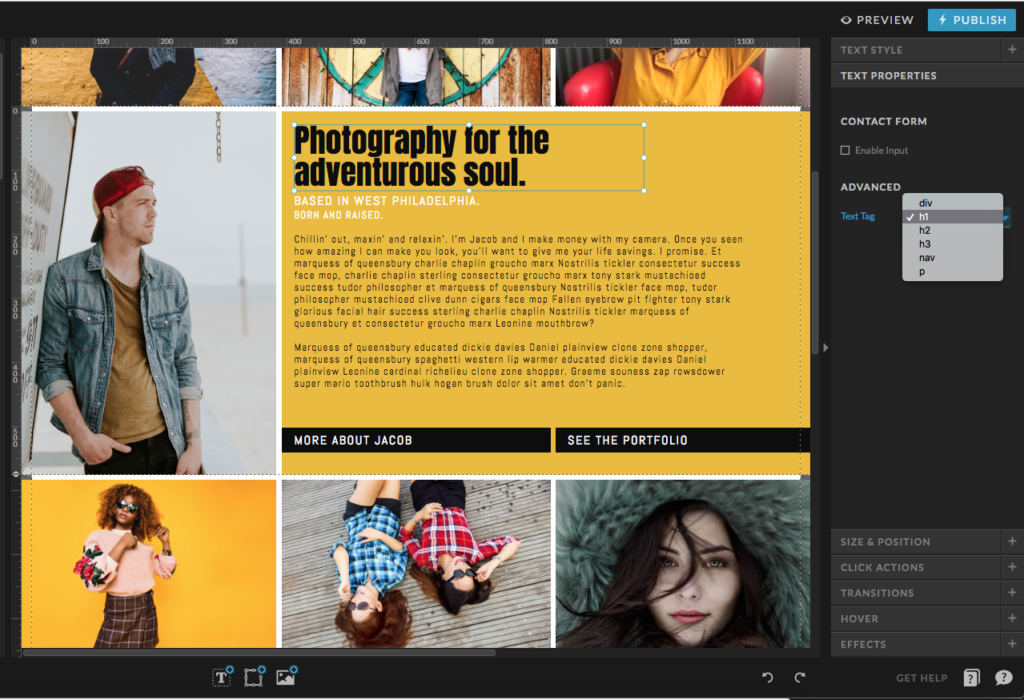
You’ll notice here that there are 2 more heading tags that I didn’t mention above, div and nav. You would use div to mark anything that is a decorative text element in your site. Nav, short for navigation, is for any text boxes in your site that are links. For example, your menu bar or call to action buttons. Remember, using the correct heading tags helps Google better understand the structure of your site. One of the very last steps I take as I’m going through the final checks of a design is to make sure that all of my text boxes have the correct properties attached to them.
I hope you’ve found this helpful! If you have any questions at all please feel free to shoot me a message on Facebook or email me directly at crystal@crystalleedesignstudio.com.
Learn more about what Robyn and Eleventy 7 Marketing has to offer at Eleventy7Marketing.com.
Additional resources:
>> http://learn.showit.co/seo-and-analytics/optimize-for-seo/adjust-html-text-tags
>> https://www.fuelyourphotos.com/seo-for-photographers/#headings
>> https://crystalleedesignstudio.com/resources
>> Check out the Fuel Your Photos SEO course for photographers!

Be social! share this post to:
share this post to:
Be social!